Material Requirements
The following materials shall be available on the rig upon arrival on location:
- 30″ conductor casing pipes as per the Drilling Program (squnch joints, rapid lock connectors or welded preparation).
- Pile hammer.
- Equipment for handling joints.
- Welding machine, if using welded connections.
- 26″ bits.
- 26″ stabs as per the BHA program.
- 20″ casing.
- 20″ casing equipment (shoe, etc.).
- Plate for 5″ DP (inner-string).
- 20″ cementing plug (for emergency).
- 20″ circulating head.
- 171/2” bits.
- 171/2” stabs as per BHA program.
- 121/4” bit and stabs for pilot hole, if necessary.
- Sufficient cement for a 20″ cementing job.
- Material for light slurry, if needed.
- Mud materials enough to drill a 26″ hole, plus materials for mixing kill mud.
- LCM materials.
- Sealing adapter assembly for 20” casing cementing job (with 20″ 5″ DP centralisers).
- Wellhead equipment for 20″ casing.
If quick joint is to be used, the following equipment shall be available:
- Hydraulic tong 30” type Joy AA -X.
- Two hydraulic clamp 30” 250t.
- Side door elevator.
- Hydraulic power unit.
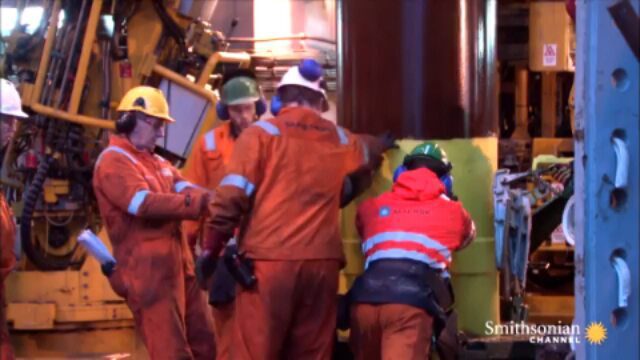
During the installation of the drilling rig, the following operations shall be carried out:
- Inspect materials as per the above list.
- Mixing mud (this operation is to be started as soon as the rig is in operating condition).
- Rig up for driving operations on the 30″ conductor pipe.
The Running Procedure
If a quick joint system is used:
- The length of each joint will be 12-15 m (40-50ft) approximately, unless using nonstandard specification. The driving shoe shall be built as per figure 4.d with a 45 degree internal bevel on the lower end.
- Each joint will be lifted on to the rig floor with a side door elevator, 30” x 150 T.
- Each joint will be run in hole with a hydraulic clamp, 30” x 250 T.
- The casing string will be hung of on the rotary slips with a hydraulic clamp, 30” x 250 T.
If a welded joint system is used:
- The 30″ conductor pipe end has to be checked in order to ensure this is a maximum angle of 30 degree for welding operations.
- The length of each joint will be 12-15 m (40-50 ft) approximately, unless non standard specification. The driving shoe shall be built with a 45 degree internal bevel on the lower end.
- Each joint of CP will have two pad eyes installed appropriately dimensioned and welded 1.5m below the upper end and one lifting eye welded close to the lower end to permit easy handling with the rig crane. Do not weld on pad eyes if internal or external elevators are available.
- A 31″ false rotary table, to ensure better pipe stabbing, shall be positioned on top of the rotary table
- The diesel pipe hammer shall be positioned on the rig floor prior to driving operations and all equipment shall be inspected. Every conductor pipe joint shall be measured and marked.
- Pick up the shoe joint with the travelling block, cut and remove the lifting eye, run the joint through the 31″ false rotary table. L and the joint on the pad eyes.
- Pick up the next joint and add to the shoe joint. The connection is obtained by welding the pipe ends.
- Pick up another conductor pipe with the travelling block, cut and remove the pad eyes on the shoe joint.
- Lower the string until the conductor pipe shoe reaches the bottom of the cellar or thesea bed, if on a Jack-Up rig.
- With the travelling block and the slings, pick-up and stab the pipe hammer onto the last joint.
- Begin driving operations on the conductor pipe, closely monitoring the first blows as the penetration may be very high.
- Stop hammering once the pad eyes are about 0.5m above the 31″ false rotary table. Do not remove the pad eyes.
- Remove the pipe hammer.
- Pick-up the next joint, make the connection, remove the pad eyes and lifting eye on previous joint and continue driving operations.
- Continue until the planned penetration or the maximum blowing energy is reached (Refer to the Drilling Program).
If the maximum blowing energy is reached before the requested penetration
- Remove the hammer.
- Install two pad eyes on the 30” CP joint 0.5m above the spider deck level.
- Suspend the conductor pipe at rig substructure with four slings.
- Cut the 30” CP about 1.5m above spider deck level and remove the cut section.
- Remove the 31″ false rotary table.
- Run a 26″ bit + 3 x 9″ DC + HW-DP and wash the conductor pipe down to 0.5m above the present CP shoe.
- Pull the bit out of the hole.
- Install the 31″ false rotary.
- Pick up the cut section of conductor pipe and weld it on to the 30” CP string.
- Disconnect the suspension slings and cut the pad eyes.
- Pick up the pile hammer and resume driving operations again until the planned depth is reached. This CP internal washing operation may be repeated several times before reaching the planned depth.
- Cut the 30″ conductor pipe at a specific depth (according to the drilling programme) below the rotary table and install the drilling riser bell nipple and diverter system assembly. Lay down the 31″ false rotary from the rig floor.
- Install two pad eyes on the CP just above spider deck level and anchor the conductor pipe with four slings to the rig substructure (if required).
- Jack-up drilling in deep water, often experience problems with conductor pipe tensioning. Normal cables and turnbuckles are not sufficient for the wind, wave, current and temperature conditions which can cause movement when constant tension must be maintained. To resolve these conductor pipe tensioning problems, a multiple hydraulic cylinder tensioning system may be used.